
Camp Tent
Tent Modelling Parts 1>2

First, I made a ground plane to put the modelled tent on.

Then, I created a display layer to lock the ground plane so I can’t accidentally move the polygon while box-modelling the tent body on the ground.


As I set up the scene, I needed to find some template imagery that I could use for reference to model my very own 3D tent.


After searching for references, I came across the image below and felt it was a detailed shape to model for the tent.

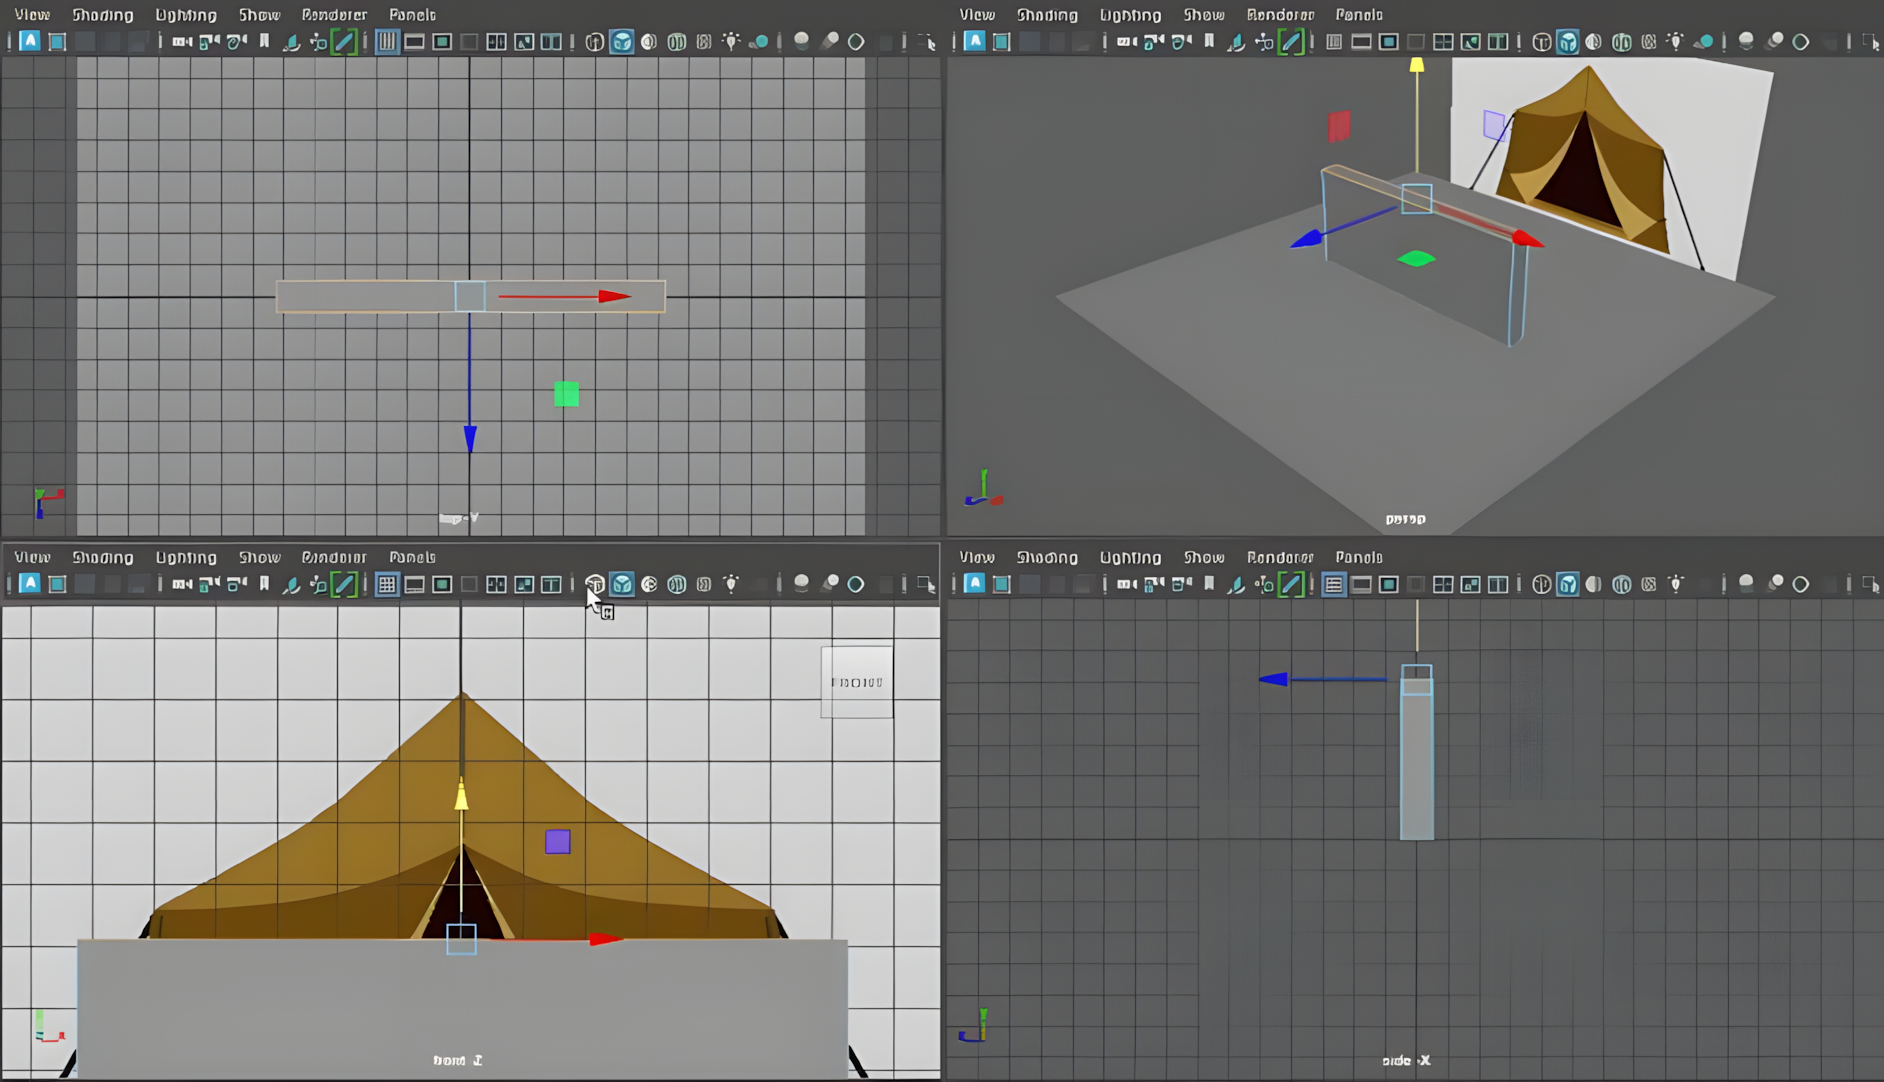
To get my reference image into Maya, I import it as an image plane, that I could then box model in front of, to achieve the basic shape.


I was also required to lock the display layer of the image plane so that when I’m moving the vertex and polygons, I won’t accidentally move the image I’m referencing.


Starting the tent, I created a cube polygon to box model into a new unique shape.

I scaled the cube’s length and height to the tent's reference image and changed it to a wireframe in the front orthographic viewport. This made it easier to move the vertex, edges and faces whilst seeing the reference template underneath.


Once the polygon was roughly made to the correct size, I added subdivisions to join the top & bottom edges together, with 1 connect segment (in the centre), using the Connect Tool.


I added some edge loops around the circumference of the polygon, by pressing shift and using the multi-cut tool. This gives vertices that I could manipulate to adjust the box shape to look like the tent I was referencing.


After adding edge loops, this made it easier to select the vertex to scale them inwards to the shape of the tent.


After adjusting the vertex, I moved the top corner vertices to the tip of the tent. I needed to combine these two vertices together by merging them to the centre in the edit mesh drop-down menu. However, I made a minor error when I did, which was luckily solved later.


I adjusted each outside vertex to line up with the outside reference image.


Requiring more edge loops, to smooth out the sides to round out the polygon shape.


The next step was to scale the depth of the polygon to give the tent higher quality dimensions.


When I got to this point, I realised that I made a mistake when merging the vertex (at the tip of the tent). I merged all vertices at the top when I only wanted to merge the 3 front and back vertices. I added another edge loop in the centre of the polygon and also merged the centre 3 vertices.


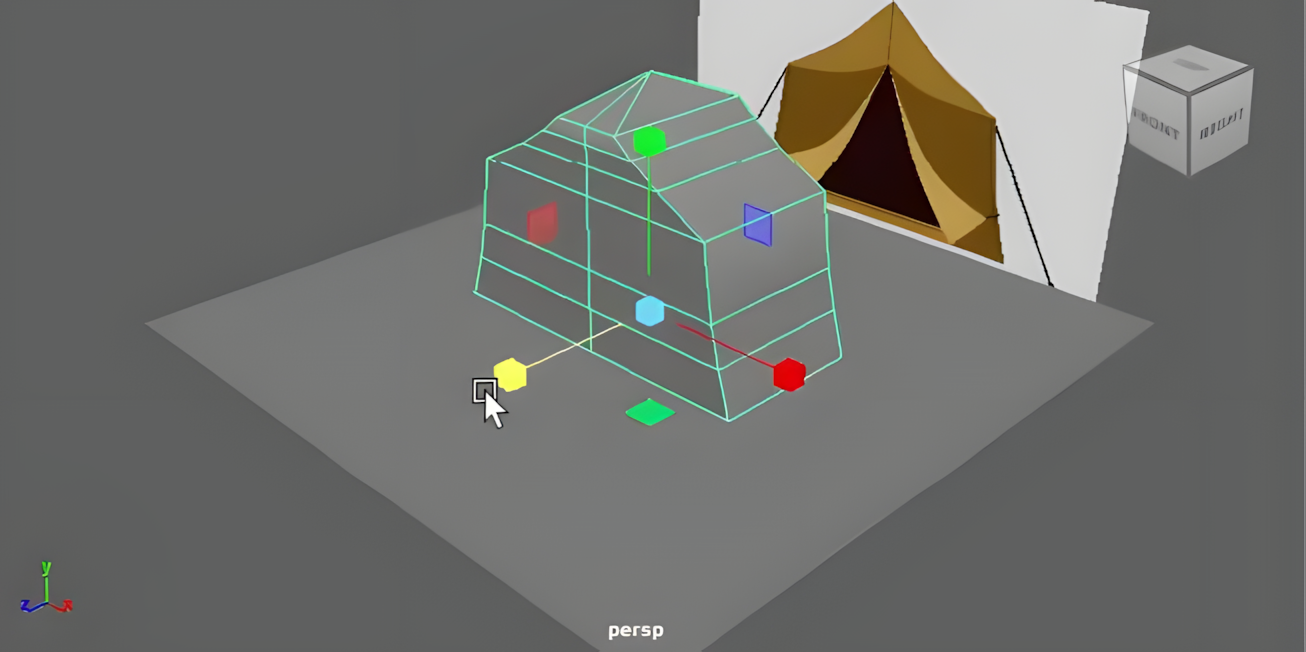
I added an edge loop to the left-hand side of the tent, but for some reason, it did not want to go completely around, which was a problem I needed to solve.


So I tried to fix the previous problem by using the multi-cut tool to create vertices and edges to go around the top polygon faces. Afterwards, I had to adjust the new vertex I made to straighten up the edges I created, however, this created bumps in the mesh that I couldn’t sort out.


I reset the polygon to find a different way of creating the edge loop that went all the way around. I created an edge at the top using the multi-cut tool as a reference. I created another edge loop that went around the circumference of the model. Then after creating the edge loop, I deleted the reference edge which I didn't need anymore.


I repeated the process for the edge loop for the right side of the tent.

So after fixing the problem I had, I readjusted the depth of my tent to be thicker by scaling the z-axis.


After completing the body of the tent, I added the detail of the front fabric being open by adding edges and vertices, using the multi-cut tool, following the lines of the reference image.


I moved a vertex to get to the edge of the opening of the fabric door. And I moved the vertex on both sides of the open door. So I moved them closer together to create the point to get the flap open.


The minor error I needed to solve, was when I was making the edges to develop the open tent doors. I
selected the front/back vertex when I only wanted to select just the front vertex.


When I only moved the front vertex, I could still the back edges so I needed to move the image plane nearer the front to hide the back geometry.


After making the vertices close together, I needed to merge them together in the drop-down menu.


I moved the below vertex into the optimal position to mirror the vertex on the left.


Mistakenly, I put the vertex on the right, in the wrong place, and didn't match the vertex on the left, as seen in the the image below. I realised later on, during the modelling process and fixed it because it bothered me.

These are all the vertices I added with the multi-cut tool to create the opening of the tent.


The stage is when I fixed my previous symmetry vertex problem that I had, once I noticed it in the moving vertices process.

I adjusted the edge line after moving the symmetry vertex so that it was in line with the rest of the edge.


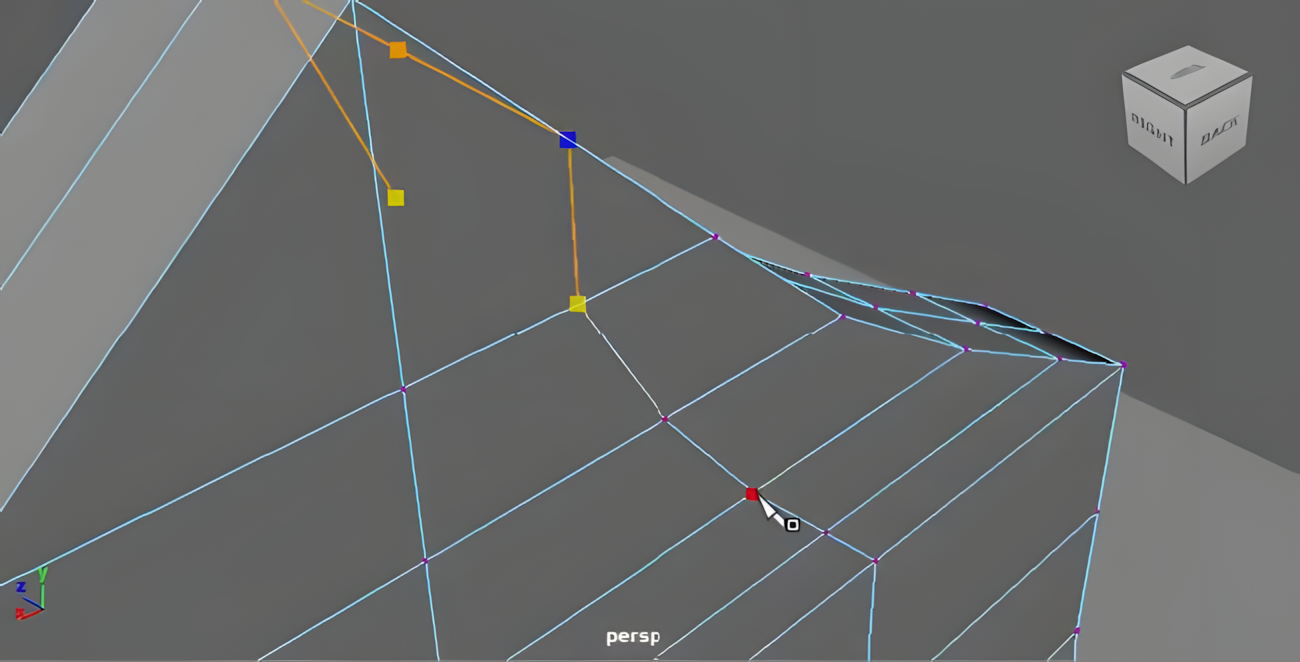
This is where I removed the faces of the polygons that were blocking the opening of the door.


In reflection, I wish I hadn't done this step. Because it was messing with the object's topology when I removed the connecting edge to the door.


At this part of the modelling, I needed to fix the door’s topology as there were a lot of N-gons with 5
or more vertices that I needed to change to Quads or Tris, which I did using the multi-cut tool.


After fixing the topology, I selected all the faces of the folded fabric and extruded the faces outwards to give it dimension.
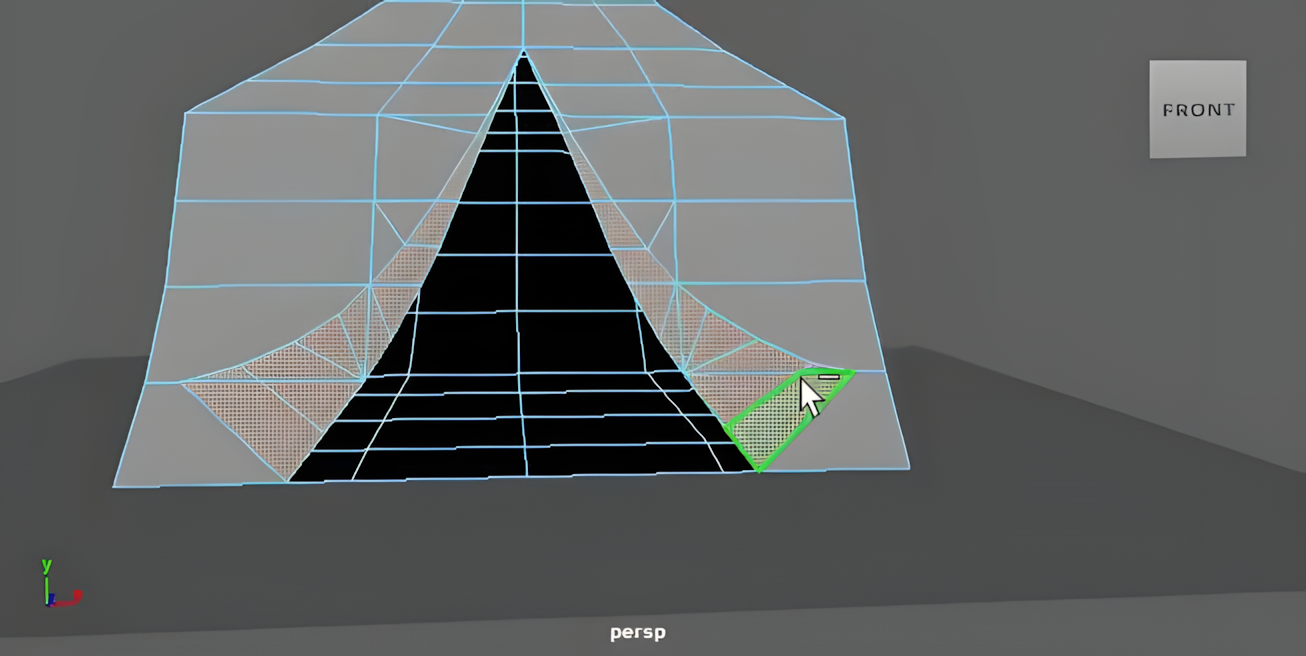


I didn’t like how the tip of the hole looked so I connected the vertices to round out the tent curtains using the merge tool in the edit mesh drop-down.


After extruding, I rotated the vertices on the curtains to round out the curtains to make them look like they were in motion (i.e. blowing in the wind).


I finished Tent modelling and after that, I had to start adding tent ropes.

I inserted a cylinder polygon. I scaled down the x and z axes to slim the rope. I added ten subdivisions
to the cylinder to give it more of a ridged look.


I placed the pole at the end of the rope and stretched the y-axis to make the rope longer. As I scaled
it down, I realised I needed two more subdivisions to round out the cylinder a bit more.


After getting the dimensions correct, I selected the bottom vertices to place the end of the cylinder at the end of the tent ropes on the image. After that, I selected the top vertices to drag the cylinder
to the corner of the tent, making the cylinder look like tent ropes.


After I got the dimensions correct, I needed to make the cylinder diagonal to the tent by moving the bottom vertices over to the corner.


When I finished modelling the first guide rope, I duplicated it and tried to use the flip modifier to
make it easier to move to the other side of the tent, however, it did not work. Then I renamed both
cylinders so I knew which object was which, making my workflow a lot easier.
As the flip modifier didn’t work, I had to move the cylinder to the correct position manually by moving the top vertices to the right-hand corner of the tent and moving the bottom vertices to the corner of the plane. When I did this, the vertices were on a tilt, which needed fixing.


Now with everything in the right position, I needed to rotate the top and bottom vertices so that they were straightened. This is where I feel the model of the tent was complete, with the ability to return to add extra guide ropes.


I learnt to design a 3D camp shelter & foldable chair for this project to develop my skills in the
modelling in Maya and I needed these items for the VR environment that the puppets are going to
live in.
I really enjoyed modelling these items as I created them with just two simple shapes (Cubes &
Cylinders), also I enjoyed how the models turned out even though they’re still not finished, they look professional.
The chair and tent modelling helped the project as it aided me in applying the correct topology to the models and learning to model items using image planes.
I’m going to be learning to model a tent and foldable chair using an image plane after I learnt how to develop this technique in a previous lecture.